![]()
What needs to be said in the very first lines of this article: in Russia, the CIS countries and most countries of the world, hunting with a crossbow is illegal, and the crossbows themselves (if their tension exceeds 40 kg) are equated to melee weapons. There is a fine for wearing and using them. Why, in this case, am I giving recommendations on making an objectively dangerous piece that can cause problems for readers? Because the ability to hunt with the use of a wide variety of weapons, including homemade and even illegal ones, may one day be useful to each of us. Few people think about this while the store shelves are full of food - but we live too in an unstable time to say with full confidence that it will always be this way.
In one of the previous articles I wrote about for hunting: with the help of this frivolous at first glance weapon, it is easy to get small fur-bearing animals, birds and reptiles. With a crossbow, you can shoot medium-sized game. Of course, we are not talking about toys from the shops of legal weapons: you may have seen these on sale - graceful, light and low-powered. A weak crossbow designed for shooting sports- it should be understood how great the difference is between him and a real combat device. That is why the latter are prohibited. An arrow fired from a powerful combat crossbow pierces a person right through, even if he is wearing a Kevlar bulletproof vest.
But until the BP burst out, you and I are peaceful hunters, and we do not think about the use of deadly weapons against people. Why am I writing now about homemade crossbow for hunting? Why not buy a ready-made one or order from an experienced craftsman? Because legally nothing worthwhile will be sold to you. And it is generally better not to buy illegal weapons if you do not want to get problems with the law. Yes, having something killer in the bins and knowing how to use it is useful, but not a single living soul should know that you have it. It is better not to devote even friends and family to this - not to mention completely strangers like sellers and couriers.
 How to make a crossbow at home?
So how to make a crossbow with your own hands? First of all, decide what power the weapon you need - its design and materials directly depend on this. For hunting ducks and hares, the simplest device with a wooden arch is suitable. For larger animals, a metal one is already needed. There are also so-called composite arcs, which are a combination of several materials (traditionally wood, antler, veins, but now more often different types of plastic are used). Their specifications are excellent, but it is practically impossible for a non-professional to make such a detail “on the knee” with high quality. In order to avoid injury among readers, I will not even give a description of the assembly of a compound arc here.
My opinion: it is advisable to use a metal arc. The power reserve will not be superfluous - in addition, wooden parts fail faster, which is also fraught with injury for the shooter himself. Since your goal is to make a fairly powerful crossbow, look for springs from Soviet passenger cars from friends or in the secondary market of auto parts. Humanity has not yet come up with anything better for using as an arc. But if you still did not manage to get this rarity, take any elastic metal strip 2-3 cm wide and 3-4 mm thick.
The bed is most often made of wood (spruce, aspen), less often of metal. The more powerful the crossbow is planned, the more durable and massive this part should be. The designs of the stock may differ, but the groove for the boom should be on it, as well as the butt and mounts under trigger, arc and other functional elements.
An inelastic rope made of synthetic fibers, a steel cable, or guitar string... You may be surprised, but it is the first of three options demonstrates the best tensile strength. Durable, cheap and affordable - what else do you need? .. But what: impregnation of beeswax will extend the life of the synthetic bowstring, protecting it from moisture and friction.
The crossbow mechanism, rollers and mounts are the most interesting. It is difficult to make them “on the knee” if you do not have the skills to work with metal. Below I give the drawings of the homemade simple crossbow(1) and powerful combat (2). All parts that you cannot make on your own, order in the workshop, providing drawings of the parts of interest.
Drawing of a simple crossbow (1) * click to enlarge *
 Combat crossbow blueprints (2) * click to enlarge *


How to make arrows for a crossbow?
Bolts - arrows for a crossbow, it's easy to make with your own hands. For these purposes, wood is most often used, less often plastic and metal. Why is wood better? A wooden bolt has optimal weight: a light plastic arrow quickly loses speed, and a piece of steel wire is heavy and will not fly far. The shaft should be planed along the grain for better flexibility and then dried well. At the end, we leave a cut into which the tip will be inserted.
The tip itself must be cut out of a steel sheet (thickness not less than 0.7 mm) with metal scissors and finished with a sharpening stone - align and sharpen the edge. We insert the tips into the cut, lubricating it with epoxy. You can also thread it for strength, and apply a layer of epoxy on top.
There are also many options for making the plumage of the bolt, but the best, in my opinion, is bird feathers. Ideally, goose, but will fit even from the tail of a pigeon, which is much easier for a city dweller to find - they are lying underfoot. We split the feather in two, cut each half in half and glue it to the arrow. For strength, we tie it with threads.
Here's what happened in the end:

It is important that all bolts are the same in weight and length so that it will be easier to target your homemade crossbow. And it is imperative to shoot him: the hunt will wait, first you need to master the new weapon well, to feel it. Even if you have experience with crossbow shooting, this one will be a little different, more "yours" - like any thing made with your own hands.
There are no related articles.
To make a reliable crossbow on your own, there is not much desire and hard work. It is also necessary to acquire the necessary knowledge base, technical and material base. You can, of course, grab a piece of wood and a car spring, and start with the persistence of a maniac to saw, plan, sharpen and drill, approximately focusing on the found drawings of the crossbow design. But as a result, it may turn out that your crossbow is too heavy, uncomfortable and, in general, you did not succeed, what you dreamed and imagined.
What to do? First, you need to decide exactly what kind of crossbow you want to make. After all, there are a huge number of varieties of this throwing weapon, and each has its own technical features.
Secondly, you need to know exactly your capabilities in terms of equipment with which you will make every detail of the crossbow. And, thirdly, think carefully about where and what material you will take for the manufacture of this or that design of the crossbow.
So let's start by replenishing our knowledge of crossbows and their varieties. First, let's see the general structure of the crossbow.
As a rule, any crossbow consists of the following parts and mechanisms:
- crossbow stock and guides;
- bow and shoulders;
- trigger mechanism;
- sighting device;
- tensioning devices;
- bowstring;
- arrows (bolts).
Now let's talk a little about the classification of crossbows. All crossbows are classified according to several criteria.
Classification by the strength of the tension of the arms of the crossbow:
- Pulling force up to 20 kilograms. These crossbows are most commonly used for recreation and entertainment. The aimed firing range is not very great and reaches 15-20 meters.
- Crossbows with a pulling force of 20 to 55 kilograms allow you to cock the trigger using muscular strength, without any additional devices. Their sighting range is already 60-70 meters.
- Crossbows with a pulling force of over 55 kilograms are already considered a serious weapon and require special cocking devices to pull the bowstring.
Classification by the type of bow used.
- Monoluk - can be homogeneous, made of fiberglass or steel, as well as composite using certain types of wood.
- Shoulders plus a block - in this case, an intermediate device is made to fasten the shoulders of the bow - a block. Such a crossbow is quite convenient for transportation, as it can be easily disassembled.
Classification by the type of shoulders used.
- They can be block - using eccentrics and rollers, as well as having one main and two additional bowstrings.
- Classic - S-shaped arched bend type.
- Straight - in an unbent position, the shoulders form a straight segment.
Classification by the used stock of the crossbow.
- A classic rifle-type stock, it has a one-piece stock, forend and neck.
- Sports stock with pistol grip and slot in the butt
- Old-style stock, made in the image of medieval crossbows.
Tension classification.
- The muscular way of pulling - has a stirrup, a system of levers or a special hook.
- The so-called "goat's leg" is a special single-arm lever.
- Multi-roller block tensioning.
- Gate - this device has a toothed rack and a worm gear
Now that we have got some idea of the structure of crossbows, you might think about which design is right for you, given your technical capabilities. That is, do you have the opportunity to use metal and woodworking machines. Believe me, having only a plane, a drill and a hacksaw for metal in your hands, you cannot make a real high-quality crossbow. Some parts can only be made by a competent turner. Even having detailed drawings of a crossbow in your hands, you will have to apply maximum effort, invention, and ingenuity to do everything beautifully and technically competently.
Let's start making a crossbow from a bed. First, we will select the right wood. We need a kind of wood that would not warp, not prick, and would be quite viscous. These parameters are fully met by such species as beech, ash, walnut or birch.
A board with a thickness of 30 cm is quite suitable as a starting material for a bed. Now you need to decide on the size of the bed. The figure below shows how to determine its size according to your physical parameters.
Where:
A - these are your main physical dimensions.
- L - Length from the elbow to the nail of the index finger.
- H3 is the height from the clavicle to the pupil.
- B2 - width chest from one axillary part of the body to the other.
B - the size of the future bed.
- Lp is the length of the stock, it is measured from the front of the trigger to the heel of the butt. (5-15 mm longer than the middle of the back of the butt)
- Lps is the length from the trigger to the middle of the occipital part of the butt. (distance L)
- Lн - the length of the stock from the trigger to the toe of the butt. (0 + -15 mm longer or shorter than the distance to the middle of the occipital part of the butt, depending on the fullness of the chest)
- a - the distance of the bend of the stock to the bottom in front of the butt.
- o - the distance of the bend of the stock to the bottom to the heel of the butt. (Do the dimensions "a" and "o" depending on the distance H3)
B - withdrawal of the bed and its change to the side, which depend on the width of the chest (B2)
- Op is the distance of the withdrawal of the bed to the heel of the butt.
- He is the distance of the stock retraction to the fore part of the butt.
The stock is measured from the beginning of the trigger to various points on the back of the butt. Use the illustration above to fit the stock to fit your body. But the average sizes are as follows:
- From the beginning of the trigger to the heel - 360-365 mm.
- The distance from the hook to the toe of the butt (Lн) is 368-372mm.
- To the midpoint located on the occipital plane (L1) - 356-360mm.
- "A" - 40-45 mm. "B" - 55-60mm.
Focusing on this table and making measurements own body, you will be able to choose the optimal size of the stock for the crossbow, which will ideally suit you. Hard? It's okay, as they say "hard to learn, easy to use"
Next, you can proceed to the direct manufacture of the bed itself. It is recommended that you first cut a template out of paper by drawing a stock on it according to the dimensions that you measured and determined using the table. can be found easily on the internet.
We will talk about how to make a crossbow stock, trigger mechanism and shoulders step by step in other articles. Here, our task is to learn how to determine the dimensions of the crossbow parts necessary for you and the material from which they will be made.
Now let's see where we start making the shoulders of the crossbow. And you need to start, as always, with the choice of the material from which we will make the shoulders. I think you have already decided which crossbow you will make: with compound bow, or a mono bow.
The material for making the shoulders can be as follows:
- We use the shoulders from the sports bow, if you have one. You can visit any sport sections, there decommissioned bows can be begged for free, one devil must be destroyed. They, however, can be used for weak crossbows with a pulling force of 17 to 20 kg.
- Textolite, or fiberglass - can be found in hardware stores. The pulling force is also low up to 20 kg. Usually used to create crossbows for game purposes.
- Car Springs - Rummage in your garage, neighbors' garage, or technical junkyard.
- Aluminum, titanium, steel - we are looking for also in hardware stores.
- Fiberglass, carbon fiber and various composite materials - again, we shake building materials stores.
The highest quality crossbow arms are obtained from fiberglass and composite materials... Below is a drawing with the dimensions of the fiberglass arms with a tension of up to 40 kg.
A car spring can be used to make a mono bow. The bowstring is attached to it either with wheels, or pulled over a trident.
A mono-bow with a bowstring fastening by means of rollers.
 This article will be devoted to such throwing weapons as a homemade crossbow. From the following lines, you will not learn how to make a crossbow yourself, but you will get information about what homemade crossbows are and how well they shoot. Also, within the framework of this article, we will touch upon the issue of the legality and expediency of such a hobby.
The material will be critical and we will try to dissuade you from such a dubious undertaking as making a crossbow at home. Let's get started, I hope you find it interesting.
Archeri market in Russia is growing from year to year. There are more and more fans of silent and accurate shooting in the country, and what can be better for this activity than a crossbow? maybe compound bow, but to shoot accurately from a bow requires skill and some experience.
With a crossbow, everything is somewhat simpler. The form factor of a rifle with a shoulder rest, the ability to install optics or a collimator make shooting from this type of weapon more familiar, and, therefore, more popular among consumers.
There are not many brands in the world that produce high-quality and reliable crossbows. You can count a dozen companies, and almost all of these manufacturers are represented on our website. But in general, manufacturers satisfy the demand of almost all categories of consumers. The price of a crossbow starts at 5,000 rubles, the question is natural - who and why in such a situation make a crossbow on their own, if you can just buy it in a store.

As a rule, very young people up to 20 years old are engaged in this kind of crafts, or men with wise experience who are fond of designing, and very often designing everything. Very rarely, almost never, a homemade crossbow begins to be made by a person who is sorry for the money to buy.
In fact, despite the deceptive simplicity of the design, making a crossbow on your own is not as easy as it seems. Most often, homemade crossbows are made from bows, or spring-like steel plates with blocks. Kulibin uses a metal cable as a bowstring. Such bulky things shoot badly, they weigh a lot, they fall crookedly.
If we talk about blocks for a homemade crossbow, then they, as a rule, are either grinded independently, or, in some cases, they use aluminum coils from old bobbin tape recorders. The wear of such eccentrics is extremely high and they fly even from a normal shot, not to mention idle

The stock of a homemade crossbow can be either steel or wood. It all depends on the fantasy of a particular "Kulibin". Mechanisms from old guns are used as a trigger, or everything is made independently on milling machines. Popular among homemade ones is also such a game as making a block crossbow from a recursive one.
As a spoonful of honey, let's say that sometimes very spectacular gizmos are obtained, of impressive size and impressive power. The main problem with homemade crossbows is the accuracy of hits, which cannot be compared with branded models. On various forums you can see photos of homemade crossbows with brief description technical characteristics. And among the mass of slag, you can find models with a tensile force of 40 kg. and a firing range of about 100 meters. But here's the catch - the ballistics of home-made crossbows, as a rule, are not at all and to get somewhere even from 50 meters, let alone 100, is practically impossible.

For you to understand, branded models are thoroughly tested before being released into production, and they are aimed at targets of various types, and all discovered deficiencies are corrected. Then, already modernized and devoid of flaws from the last test, the crossbow is tested again. And so on, until the declared range and aiming accuracy are achieved. Needless to say that in the case of "homemade" all this is not?

Another disadvantage is the legality of such a hobby. If you overdo it with increasing tension, you can get an impressive administrative fine, provided that the product is found in your possession by the police. However, the police will be obliged to seize such a thing from you, even if the increase in tension does not exceed 40 kg, because you will not have certificates for the product.
If you want to make a crossbow yourself, we strongly recommend that you think carefully before getting started. This activity, although interesting, but laborious, and the result is completely unpredictable. At the exit, you can get either a deadly bazooka or a zilch.
At the same time, remember that it is difficult to call this activity legal. In the best case, the product will be confiscated from you; in the worst case, you will also pay for it. This opinion is a purely personal point of view of the author of the article and may not coincide with yours. In our opinion, it is much easier, wiser and more convenient to buy a crossbow in an online store.
In this case, you will receive a guaranteed result, declared technical characteristics and a full package of documents, including certificates, stating that this product is not a weapon.
In retail outlets, many different crossbows are sold for every taste. But you can not only buy it, but also make it yourself, if you were inspired by a movie or a visit to a museum to create it.
Start making a crossbow with an arc. Since it was decided that it should be powerful, then for the arc you need to take the petal from the spring of the UAZ car. Then with the help of the "grinder" we cut out an arc from this petal. It should be 85 cm long and 3 cm wide in the center and 1.5 cm at the edges. Next, using a sharpener, give a thickness of 0.8 cm in the center with a gradual transition of 0.4 cm at the edges. Do further processing of the arc using files of different grain sizes and sandpaper. It is not bad to process the spring lengthwise, across it is almost not processed with a file. Then, with a drill with a victorious soldering, make holes for attaching the arc to the stock and for fixing the bowstring holders.

The next step will be making the bed. It is better to make it out of ash. This is a fairly strong tree, does not split and does not crack. Take a board that is 90 cm long, 20 cm wide and 6 cm thick and flatten it on a planer machine. Then draw a drawing of the stock with a pencil, you can take a hunting rifle as a sample. Next, use a hand jigsaw to cut the stock out of the board. Use a woodworking rasp to fine-tune the stock to give it the desired and comfortable shape. The process is lengthy and rather laborious. Make a finer sanding different kinds sandpaper. The arrow groove must be made with a grindstone. Take a used soft abrasive stone, shape it into a round shape with a harder stone, and place it on the sharpener and make a cut. The groove will turn out to be even and of the same depth.
Next, we will be engaged in the manufacture of the trigger. Use a chisel in the stock to make a depression for the nut and the spring. Make the "nut" that will hold the bowstring out of a piece of iron without welding, so that it is stronger, since it will have all the main load. On the stock, in the place of attachment of the "nut", install the iron "cheeks" so that the pulling force does not pull it out of the tree. Place a return spring under it and connect it to the trigger guard with a rod. Next, close the trigger mechanism with metal decorative overlays. Fasten the overlays to the stock with powerful screws to make it stronger.

Then start making the mount, with which the arc is fixed to the stock. To do this, take two iron bars and bend them in an L-shape. Use a rail with a thickness of 6 mm and a width of 25 mm. Drill holes in them for attachment to the stock and to the arch. First fix the L-shaped pieces with two M6 bolts on the stock. Then make a "stirrup" for the leg and weld a tire to it, which was supposed to be an additional attachment for the crossbow arc. Then fix the "stirrup" and the arc on the stock with two bolts and M8 nuts. Make a spring steel piece to hold the boom. Bend the iron bar in an L-shape and attach it with a bolt to the stock, and a piece of spring tape to the bar. Use a 4mm iron cable for the string. Paint all metal parts with black paint, and paint the wooden bed with stain and clear varnish, which will give the crossbow a rather elegant look.

Make arrows from pine. Use a circular saw to cut straight dry board strips. Then, using glass and sandpaper, give them a round shape of the required thickness. Make the feathers on the arrows from thin fiberglass, and the tips from old files. Attach the tips to the shaft with epoxy glue and thin wire. They will turn out to be light with the correct center of gravity and strong enough, they should be 40 cm long and 1 cm thick.
In general, you get a crossbow to glory. The aiming range of such a device is about 70 meters, the flight range of the arrow is close to 400 meters, it breaks a slate sheet from 10 meters, and if the arrow is driven into a tree, then it must be removed with a hammer and chisel. Accuracy is also good, and if you use laser pointer, is generally made fantastic.
In order to assemble a real rapid-fire combat crossbow at home, which can be quickly and automatically reloaded without unnecessary effort, it is necessary to have a lot of spare parts, which naturally cannot be found at home (rollers for a nylon cable instead of a bowstring, a sight and a high-quality trigger). In this article I will just tell you how to assemble a simple crossbow in a home workshop or at home in the back room, I will describe some practical basic subtleties that will make your toy crossbow a fighting vehicle!)

The shoulders of the crossbow can be made of the same material as for the bow: wood, iron or fiberglass (made of iron - a spring from a Moskvich car is good for this, and as fiberglass it is good polypropylene pipe which can be purchased at any hardware store). The stock for the crossbow, the recess where the arrow will be inserted in the future, is perhaps the hardest part to manufacture, which requires very precise processing and a lot of time spent.
In the absence of a well-machined metal stock at the factory, you can use a well-machined and then sanded wood stock. Do not forget that the advantage of a combat crossbow over a wooden bow is not only in the firing power (although a homemade crossbow without rollers and a block system is unlikely to exceed a bow in this indicator), but primarily in the convenience of the design and the ability to conduct aimed fire.
To do this, you need to calculate the flight path of the arrow, adjust the stock so that it is located at an angle (average value 5-6 degrees), but I advise you to decide on the distance at which you are going to send arrows, and what is called "targeting" the finished product , after each series of shots, changing the angle of the bed, until the crossbow made with your hands begins to shoot at the center of the bull's-eye.

The trigger mechanism for a simple crossbow can be invented by yourself. Usually this is a lever holding the bowstring, which can be removed by pulling the trigger. Necessary condition so that it works exactly when you need it (with a large bowstring tension, a weak trigger can break off and fire itself). The bowstring should go so that when released, it returns close to the bed, but without any friction. Below is a diagram and drawing of making a simple combat crossbow at home:
Attention! The manufacture of this type of weapon can be punishable by law! Information for peaceful purposes only. All responsibility falls on the shoulders of the person.
Below are more detailed drawings and diagrams (with the indicated dimensions) that can be used to make a professional crossbow.
Despite the abundance of online stores selling throwing weapons, as well as a fantastic range of products, there are many who want to make a crossbow on their own. Most of them don't know where to start. Today we will tell you about the main design features crossbow. This knowledge will help you avoid manufacturing errors and frustration and injury in using it.

Before starting work, it is worth knowing two main points.
1. In our country, a crossbow is an entertaining and sporting weapon... Hunting with him is prohibited. Any throwing weapon with a pulling force of more than 43 kilograms is considered a combat weapon, the right to use which is given by the licensing authorities of the Ministry of Internal Affairs.
2. A crossbow is a structure that undergoes colossal loads during operation. Therefore, any carelessness in its manufacture is likely to lead to injury. Any part of it must have a multiple safety margin.
So let's find out how to make a simple crossbow at home.
The video below will tell you how to make a crossbow at home:
Onion
The source of energy of the crossbow is the bow - an elastic plate of complex shape, which has one main bend and, as an option, two additional ones at the ends. It is necessary to start making a crossbow from this particular part and adjust everything else to it - the choice of the type of tension (recursive or block), the size of the stock, the type of trigger.

Wood and composite
There is an acute question of what to use as a material for a bow: wood, composite or metal?
· The tree is the most wrong choice. The accessible "pieces of wood" lying underfoot are rubbish, suitable only for kindling stoves. Branches cut down in the forest, as they dry out, lose their elasticity, crack and fall apart. From this material you can only make something for short-term entertainment in the country.
· A composite made of fiberglass and epoxy binder is very tempting and superficially simple. But there is an obstacle - the need for scrupulous adherence to the technology of all work. Mixing proportions, drying, holding. At home, this is almost impossible.
Metal
There remains one uncontested option - metal. If you have on hand an old Moskvich with a set of leaf springs, then consider yourself lucky. One sheet is taken from the entire package - the second. If you are not too scared by the size, then the first one will do. Moreover, it has at the ends of the tube - an almost ready-made bracket for attaching blocks or bowstrings.

A block is used to attach the bow to the stock. This is a U-shaped design that wraps around the front of the stock. It can be welded tightly to the leaf of the spring, but in this case, when the bow is bent, the welded seams will experience excessive pull-off stress. Therefore, it is better to fix the ball joint from the VAZ 2108 on the block. The bow is attached to its pin. It is also convenient because there is a hole in the leaf of the spring.
If you are very strong, then you can stop at the recursive method of pulling the bowstring. To attach the blocks to the bow, if you have chosen the second spring leaf, you need to fix the brackets at its ends. A bolted (or even better riveted) connection is preferable to welding, since this assembly experiences strong vibration loads. Use the parts of the glass lifting mechanism of the same "Moskvich" as pulleys.
With regard to the bowstring, the obvious solution suggests itself: a thin metal cable. But it is not entirely correct, since steel cables do not withstand alternating loads poorly. It is better to choose a climbing rope with a diameter of 5-8 mm.

By making a bow and securing a bowstring to it, you can conduct full-scale bending tests. It's great if at the same time you have a dynamometer of 100-150 kilograms. As a result, you will learn two parameters necessary for further work: the length of the bowstring stroke and the load.
How to make a box for a powerful crossbow at home, read below.
Lodge
For this part of a homemade crossbow, wood is the only option. But not everyone. In any case, not aspen, alder, spruce or pine. Better beech, elm, oak. A billet dried for twenty years. It is clear that you will never find such a thing anywhere. Therefore, use moisture resistant plywood with a thickness of 7-9 mm. 3 or 5 contours of the stock are cut out of it, and then this package is glued with epoxy resin. Not very pretty, but extremely reliable.
· Regarding the form - give up the semi-pistol, use a straight English stock. It is not only easier to manufacture, but also more durable.
· When assembling the package of the box, it is necessary to take into account both the bowstring stroke and the load. The first determines the distance from the pad to the groove for the trigger. The second is the thickness of the walls of the box at the place of its attachment. It is the straight English stock that will allow you to avoid unnecessary thinning when moving from forend to butt.
· The most important detail of the crossbow stock is the arrow guide. It should be smooth and durable. For it, you can use the plates framing the side windows of "Moskvich", furniture fittings, and other parts similar in shape.

· If you are using the block type of string tension, then in the forend under the guide there should be a groove for the cable system. This is another element that weakens the stock, so give up the thought of making the forend slim. High will protect your fingers from getting under the bowstring and traumatic phalanx amputation.
Usually crossbows have a plastic stock.
How to make a homemade trigger mechanism for a crossbow at home, we will tell below.
This video will tell you how to make a crossbow out of wood (plywood) with your own hands:
Trigger mechanism
If you are not a sixth grade locksmith, then give up the thought of making this element yourself. Apply force and find the trigger from any spring-piston air rifle... In the most difficult case, you only have to modify his tooth holding the piston - it may be too small for a thick bowstring.
Above the trigger, a casing with a height of 2 to 5 cm is arranged, necessary in order to protect it from moisture and dirt, as well as being the basis for sighting devices - strips for optics or rear sight. Weaver, Picatinny or dovetail rails can be purchased at any online pneumatic retailer.

The front part of the casing above the trigger is made in the form of a long (no more than 10 cm) elastic "tail", which rear part the boom is held on the rail.
Making arrows
Canonically correct ammunition for a crossbow is called "bolt". But many online retailers sell crossbow arrows. For crossbows with a rifle stock, they are suitable in lengths of 14, 16, 20, 22 inches. To be absolutely frank, it is better not to find shooter arrows for you. Unfortunately, none of them costs less than 150 rubles. Therefore, it is worth trying to make them yourself.
They can be made of wood, straight-grained, without knots. Alternatively, use furniture details - balusters from chairs, railing of cribs. Good arrows are obtained from aluminum tubes with a diameter of up to 2 cm. If desired, even electrodes of the maximum diameter can be used, but they hopelessly bend when hit and it is difficult to screw the plumage to them.
Thin plastic is used for plumage. Natural bird feathers can give the unexpected effect of a chaotic change in direction of flight, since they have natural curves that must be taken into account.
The main condition for a good, smooth flight is balance. The center of gravity of the crossbow bolt should be after the first third of the length from the tip. If it is not metal, then the end of the arrow can be loaded with lead wire wrapped around the shaft.
The question of equipping an arrow with a tip must be treated without fanaticism. Sharpening metal on lathes, milling and polishing, giving exquisite shapes - these operations are available to few. Moreover, such a tip is extremely dangerous. If you don't need to punch Knight armour then the wooden bolt can simply be sharpened at a 30 degree angle using a regular knife.

There are classic models, they are similar to the ancient ones, and their design is simple. There are also modern crossbows, they are called "block". Such weapons have a more complex design due to blocks and other innovations that increase its power. It will be much more difficult to make such a crossbow at home, but a description of this process and the drawings, which will be detailed in the article, will help you with this. The crossbow has many components: a bow; bed; trigger mechanism; bowstring; some modern models have blocks at the ends of the bow.
All of these rocks are dense enough to withstand the enormous loads that will affect the bow and crossbow stock. Material preparation In order for the weapon to fire long and powerfully, its material must be properly dried for a year. Having cut off the necessary trunk or branch, both saw cuts must be painted over. You can use any glue, paint or varnish for this. If you close the cuts in this way, moisture will not be able to quickly leave the workpiece, so the wood will dry more slowly and more evenly. So internal cracks do not form in the material, and a crossbow made with your own hands at home will serve for a very long time. After that, the log is placed in a dry place, where the sun's rays will not fall on it. So it should lie for a year. Over time, the bark is removed from the workpiece, so it dries for another week. Then the log is cut in half. So it lays for another week, only after that you can start creating a crossbow. Tools for making a crossbow Knife. Saw. Plane. Sandpaper of various grain sizes. Joiner's cutter. Chisel. Drill. Making the bow On the blank, choose the side in which the annual rings of the tree are thinner.

This is the north side, the fibers on it are denser than in other parts. It is this that we will use when creating a crossbow with our own hands at home. From this part you need to make a bow. They outline the middle, from it in both directions they lay about two centimeters, marking the part that will be clamped in the box of the crossbow. This will be the thickest spot on the bow. From it, they begin to cut the material, moving gradually to the edges. Chip the workpiece gradually on both sides, while checking until it begins to bend at least a little. After that, you need to take a strong rope, make loops at its ends. This will be a test string. It is necessary to check the bow tension. It is very important that his shoulders bend evenly. By putting on an impromptu bowstring and pulling the bow, you can see where to remove the material. They are marked, carefully cut with a knife. This should be continued until the product bends evenly on both sides. Processing knots Very often knots come across on the material: some are visible immediately, others can open during the processing of the material. What they are dangerous is that because of them chips can form. Therefore, you need to process such places with a well-sharpened knife. If you are not confident or experienced, it is better to tinker a little longer and sand them with sandpaper.
You can also use a file for this purpose. Stock When the bow is ready, they lay it aside and start making the stock. To begin with, they choose where the gutter will be, along which the arrow will fly out, make this place perfectly even. It will depend on him how accurately the crossbow will shoot. To understand everything, it is better to look at the drawing of the crossbow. How to make it a bed is shown here in detail. After that, a gutter is cut to the required length. Usually it is about 30 cm. Then a depression is made for the bow and trigger. It is convenient to cut them with a chisel and a carpenter's knife. Trigger Mechanism As mentioned above, it can be made from solid wood or, if the crossbow is powerful, from metal. The simplest mechanism is the so-called "nut". It consists of a cylinder with a bowstring hook on one side and a hammer stop on the other. V powerful crossbows the trigger is more refined for easier pulling of the trigger under load. We examined in detail how to make a crossbow with our own hands. We hope that a master class with drawings will help you understand all the intricacies. This is a common medieval model. Now we will learn how to make the same weapon, only the modern model. Block crossbow Such an apparatus is much more difficult to make; it will require much more tools than for a conventional one. So, we create a crossbow with our own hands at home from fiberglass.

This material is ideal for making bows because it is biting and light at the same time. It can be cut from a single piece of fiberglass 1 cm thick, or you can make it yourself. If you are not too lazy to tinker, then it is better to make it yourself. Making fiberglass shoulders for a crossbow You need to take fiberglass or Kevlar and cut into strips. They need from 30 to 40. In general, it is better to try everything empirically. These strips are glued with epoxy resin so that everything becomes monolithic when solidified. You also need to think about how to put all this "sandwich" under the press. It is best to use boards, between which to place the shoulders, clamp everything with clamps. The epoxy should have less thickener than usual, in the range of 8 to 10%. Everything freezes in 24 hours, but if the room is cold, the time may increase. When everything is frozen, the shoulders are finalized, cutting off the protruding edges with a knife and sanding with sandpaper. Now we will analyze in detail how to make a crossbow with your own hands at home and what additional elements of its design need to be made.
Making a figured stock To do this, you need to take a board with a thickness of at least 4 cm. Mark where the butt, handle, trigger and attachments for the bow shoulders will be. In general, everything is according to the drawings. After that, you need to drill all the necessary holes and cut out. Blocks They can be made from aluminum. Better that they are on bearings. The middle parts of the wheels are perfect for roller skates... They are strong enough to withstand heavy loads and are dimensionally perfect. The axles for them are needed 5 mm thick. You can take them from the rollers or do it yourself. The mountings are made of sheet steel or similar durable material. You can also make their ends thicker before pouring epoxy resin on the shoulders of the bow, to install the blocks, in which case no fasteners are needed. After that, you need to install a trigger mechanism with a trigger and an arrow holder on a do-it-yourself crossbow at home. In general, all parts are bolted together, washers are always used. They will allow you to twist everything more tightly without damaging the material. In block crossbows, the string is longer and stretches differently. It seems to cross, and when pulled, this system allows you to give the arrow twice as much energy for flight as in the case of a conventional crossbow with the same bow. In powerful block models, the bowstring is a steel cable, only it is able to withstand a huge sharp pressure when fired. In crossbows, whose power is no more than 40-50 kg, it can be woven from nylon threads.
Making a bowstring for a crossbow Using the described method, you can make a bowstring for both a recursive and a classic crossbow. It's just that their length will be different due to the peculiarities in the designs of both models. They take a board with the length of the planned bowstring, drive in two pegs, on which a nylon thread is wound in a circle. When the thickness of this long oval becomes 5 mm, it is wrapped, making a gap of 2-3 mm between the turns. Near the pegs, you need to braid without gaps, because there will be hook loops. As for the bowstring, we can also say that if you make it too thick, then the strength of the crossbow decreases. However, the thin one can tear.
So in this case you need to choose an intermediate thickness. It is better to study similar sports models with the same interference and make the bowstring of their thickness. When this is done, the two halves are joined and wrapped together. Again, special care is needed near the hinges. Then they wrap around the middle, where the string will catch and push the arrow. This place is also done carefully, because a frictional force of enormous power will be exerted on it. All cut edges of the threads must be coated with glue. This will make them denser and more solid. This article provides drawings and a description of how to make a real crossbow at home. It's not that hard, especially when making wooden weapons. If the product is made for hunting in order to achieve enormous power, then a block model should be chosen. Its design is a little more complicated, you may need a machine to make some parts.
The crossbow is an ancient throwing weapon that was invented by the Romans. In terms of its characteristics, it is similar to a bow.
Currently, the crossbow is not used in any army in the world, it is sold in gun stores as an exclusive rarity, the cost of which sometimes exceeds a thousand dollars. Therefore, such products are very often decorations.
However, you can make an imitation of such a weapon with your own hands, which will become an excellent outfit for any boy. In addition, a toy crossbow can be made from almost any materials at hand. Also, do not forget about safety measures, since this product, although not professional, can cause significant injury to a person.
Homemade wood crossbow
In order to assemble a crossbow with your own hands, you need to make each of its parts separately:


The final step in making a crossbow is pulling the bowstring, which should be optimal. If the tension is weak, then the range of the arrow will be minimal, and if it is too large, there is a risk of deforming or breaking the arcs of the crossbow.
Mini-crossbows from other scrap materials
If a crossbow made of wood is a more professional product and can be used for sports purposes by both adults and adolescents, then crossbows made of paper, pencils or Lego bricks are intended for children from seven to twelve years old.
Also, do not forget that products made from seemingly safe materials, if handled incorrectly, can also cause harm to health.
Therefore, games with such homemade items should be supervised by adults.
Paper throwing weapons
To assemble such a toy with your own hands, you need to take care of the availability of the following materials and tools:
- fifteen sheets of paper (A4 size);
- three wooden sticks (possible from ice cream);
- string for a bowstring, best of all nylon;
- pencil;
- utility knife or scissors;
- Scotch.
The step-by-step instructions for making a paper crossbow are as follows:

This crossbow can be equipped with a sight, trigger and arrow guides.
From pencils
To make such a crossbow you will need:
- four pencils;
- seven rubber bands for money;
- one ballpoint pen;
- Scotch.
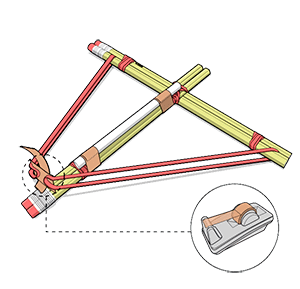
To make such a "pencil" weapon, you must perform the following steps:
- Tightly tie together two pencils with rubber bands - you get two elements of the crossbow.
- Then perpendicularly connect these two elements together.
- Tie the case from the pen on top of the pencils. This will be the boom guide.
- As a bowstring, all the same elastic bands are used that are attached to the sides of the arcs and are connected with tape or thread.
As an arrow, you can use a rod from the handle.

From the Lego constructor
To make a Lego crossbow, the first step is to purchase a construction set that is sold in almost any children's goods store. After the designer is purchased, you can start assembling it, which is carried out according to the attached instructions.
It should be borne in mind that the configuration of the designer is different, and therefore the assembled crossbows may differ from each other in size and principle of operation.
When the crossbow is assembled, it is necessary to proceed to the manufacture of arrows, which must be first of all durable and reliable. To do this, you need to observe the following nuances:
- choose the right material. In this case, it is best to use well-dried pine, birch or spruce wood;
- avoid knotty on arrow blanks;
- wood fibers should be located along the length of the future product;
- if the workpiece is uneven, you can try to level it, for this it must first be "heated" over the fire;
- be sure to make the plumage, which gives the arrow a stable and accurate flight;
- for plumage, it is recommended to use the wing feathers of a goose, wood grouse, turkey or other large birds;
- it is very important that on one arrow there are feathers from one wing (right or left);
- you can use a metal plate or a nail as a tip, or you can do without it. But for this you need to carefully round the end of the arrow (like sharpening a pencil);
- to store and transport arrows, you need to use a quiver, which you can buy in a specialized store or make yourself;
- booms should be stored upright in places with moderate humidity, otherwise the products will deform.